Sharing Google Analytics access is essential in running your business and managing your teams.
That said, it is also essential to assign the proper permissions to your Google Analytics account. This will secure your data from any potential misconfiguration. It also ensures that your users may only view the data relevant to them.
This article will discuss what you need to know about Google Analytics user permissions and how to manage them.
Table of Contents
The Different Google Analytics Permissions and Levels
User permissions are multiple access levels to your Google Analytics account that you may grant to users.
If you are the sole owner and user of the account, you do not have a problem with this. However, if you need to add users, you should provide the appropriate permissions at different levels to prevent people from snooping around all the properties, views, or report and configuration data. This is also to avoid irreversible data loss due to a faulty setup.
Permissions Levels
The hierarchical structure of Google Analytics is vital for user access control. Generally, one account should be assigned to one business. Any account could include a number of properties that are able to collect data for a website, domain, or related applications.
Also, properties could be utilized for cross-domain tracking. Permissions on the account and property level could be given to users. Organizations or agencies with multiple websites can benefit from GA4 user access management in terms of responsibility.
For example, access to a certain website (property) could be restricted. However, one should be aware that the permission of the property is inherited from the account level, if the role is higher than the five available ones.
Google Analytics allows you to grant permissions at three distinct levels inside your Google Analytics account. The structure of each Analytics account determines the degrees of user rights.
Account Level
The account level is the highest organizational level. It can have numerous properties and views.
Giving access at this level implies granting access to all of your account's attributes and views.
For instance, your organization owns a few shops. The account level represents your company, and each shop location is a property.
If you provide Analytics access at this level, that person will also have access to the analytics for each of your sites.
Property Level
A website is commonly used as a property. In the above example, each website will be configured as a property.
Allowing access at the property level entails granting access to all of the views you have configured on your property or website.
View Level
A view is a collection of data on your property. You may generate several views using various filters.
For example, you may wish to track a subdomain independently from the rest of your visitors. Or perhaps you run a lot of advertising and only want one view for sponsored traffic.
Permission Types
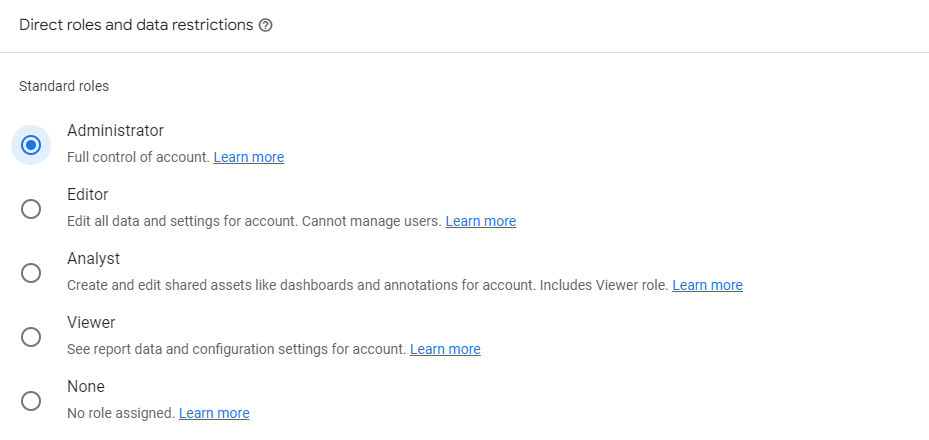
Each level has the same five permission types.
1) Administrator Role

Users with the Administrator role can carry out the following tasks:
- Add and delete users
- Manage users and provide full access to anybody, including yourself
- Has complete authority over the account, property, or view
Use this level of access should sparingly. Users at this level can lock other people out of an account. Make sure you trust the users whom you authorize at this level.
Also, bear in mind that GA4 has accounts and properties.
2) Editor Role

The editor role can do everything like an administrator except manage users and their permissions. Basically, this permission allows a user to do the following tasks:
- Add, edit, and delete accounts, properties, and views
- Add, edit, and delete goals
- Create and edit custom dimensions and metrics
- Connect Adwords, Search Console, and other products
- Add, edit, and delete filters
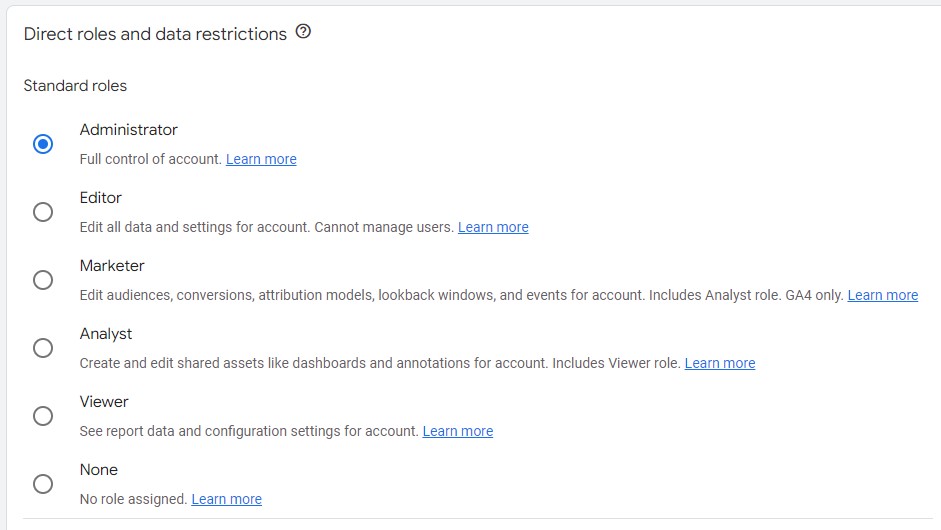
3) Marketer Role

As a marketer, the permissions in GQ4 are much more limited than those of an editor. For instance, you can’t adjust session settings. Marketers usually have an analytical skill set, but lack the technical ability to manage or create a Google Analytics account.
A Marketer inherits permissions of the roles ranked lower, and additionally, they can handle audiences, conversions, and custom events.
4) Analyst Role
Data is being studied by analysts, thus they are not in need of access to configurations associated with gathering the data or linking items to GA4, like, for instance, Google Search Console.
This position is great for working in a team. Members of the team can collaborate in an account without risking any of the settings.
The analyst role allows a user to perform the following actions:
- Create, edit, delete, and share personal assets
- Collaborate on shared assets, such as custom reports, dashboards, and segments
However, it is unable to edit any settings or manage users.
5) Viewer Role

The Viewer has the least access rights within GA4. This access only permits users to observe the data, not modify the account or property.
Even though users with this level are allowed to take a peek at the data, they cannot alter the account and cannot interact with other users on Google Analytics.
Users with this permission can perform the following actions:
- View reports
- Manipulate data in reports, such as filtering a table, adding a secondary dimension, and creating a segment
- See shared assets, but not collaborate on them
Again, the viewer role can’t edit any settings or manage users.
6) None

This permission grants no access to users.
If a person had access to the Property level but not the Account level, they would have the None permission level.
When you click on Account User Management, a user with Property permissions will appear in the None permissions type.
Data Restriction Settings
In addition to the six roles in GA4, there are two further settings for data restrictions. They offer even more power over the permissions that are attributed to users at the property level.
Data related to money can be concealed for each user role: cost metrics and revenue metrics.
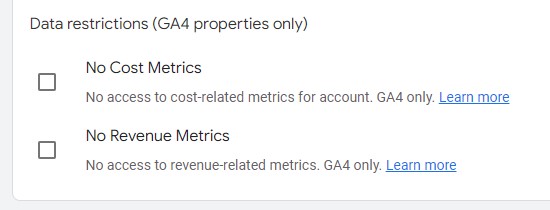
Applying these rules to users will result in them being unable to observe any of the potentially confidential details in the GA4 monetization report.
How Permission Types and Permission Levels Work
Users can only act on the levels for which they have authority.
For example, if a user is granted Administrator access at the Account level, they can add, manage, and delete users in the account and all website properties and views.
But a user with Administrator permissions at the View level can add, manage, and delete users for the only view they have permission for.
So, let’s go back to the initial example. For your business partner at your retail shop company, you may consider giving permissions at the Account level so that they can access all your different restaurant sites.
For a manager at one of your shops, you may give access at the Property level so they can check on data just for their shop's website.
How to Add Users and Manage User Permissions in GA4
This section will give you step-by-step instructions on how to add users and edit permission.
1. Sign in to your Google Analytics account.
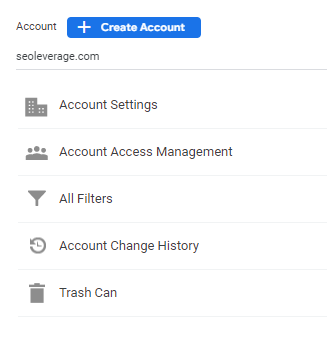
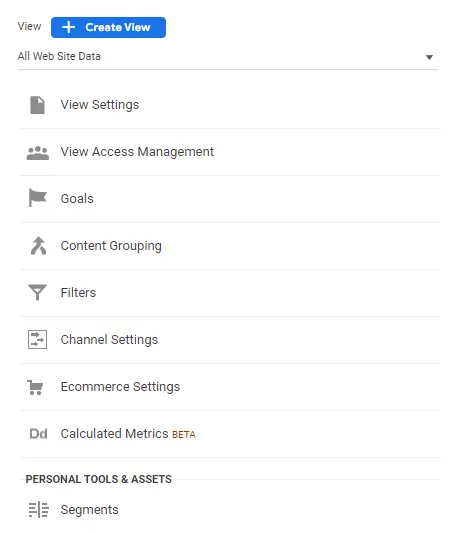
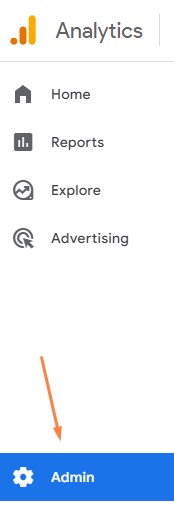
2. At the bottom of your Analytics panel on the left, select Admin.
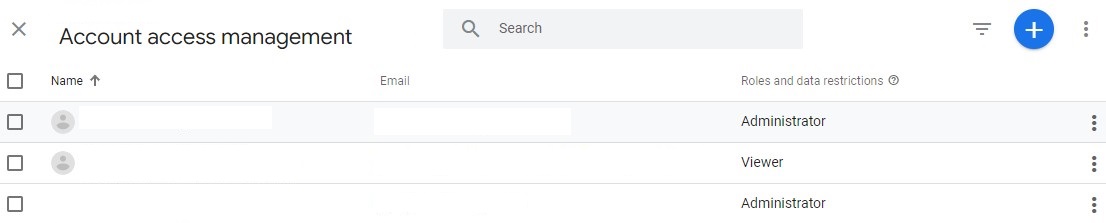
3. Select the User Management option at the level you wish to provide access: Account Access Management or Property Access Management.
4. Click the + (plus) symbol and select the option to Add New Users.

6. A new page will appear where you can create new users and apply permissions.
7. Enter the email address of the person you wish to share the account and pick their degree of access by ticking one of the boxes. You can apply them individually or select multiple options depending on your users’ needs.

8. Click the add button.

After this, your team members may now see, edit, collaborate, or manage people in your Analytics account based on your permissions.
How to Edit and Delete Users in Google Analytics Account
Even though you have Manage User access at the property and view levels and can add new users, you can only delete users if you have Manage User permissions at the Account level.
If you wish to change the permissions or delete a specific user, you may follow these steps:
1. Sign in to your Google Analytics account.
2. Go to Admin, click User Management, and choose Account or Property.
3. On the list, go to the user's name you wish to change and click on it.
4. Following that, you can pick and deselect user rights as needed.

5. After you've added or removed permissions, hit the Save button.
6. To remove a user, you can click the Remove button.