
Advertising an online store with Google Ads without getting the desired results can be frustrating if you run an online store on Shopify. Learning how to set up Shopify Google Ads Conversion Tracking is important as it can help you avoid these frustrations.
It may take time to develop your product or service because you have to take photos, write descriptions, set up a team, and develop an effective marketing plan. Running ads for an online store on Shopify can help you get the exposure you desire.
With Shopify Google Ads, you will easily drive customers and achieve the desired marketing goals. This article will take you through a simple process that you can follow to set up Google Ads conversion tracking on your Shopify store.
Table of Contents
Before getting through the rest of the article, it is important to note that you should have a Google Ads account to implement what you are about to learn. Also, we expect that you are the one managing or strategizing to run ads using Google Ads.
Google Ads conversion tracking set is essential in generating a conversion action. You should have installed a global site tag and an event snippet.
If you are tracking purchases, you will be required to regulate your event snippet to edit the translation rate depending on the purchases made.
Google Ads guidelines are essential in helping you set up Google Ads conversion tracking and generate a conversion action. One of the most popular tracking actions is tracking procurements because it assists you in gauging the effectiveness of your ads leading to sales in your online shop, determining classification to buy or sell, and giving different rates for every conversion.
Follow the steps below to create a conversion action in Google ads.
By default, it’s set to 30 days, but you can select how long you’ll be tracking conversions after an ad interaction from the drop-down. You can choose between 1 to 90 days.
From the drop-down, you can choose between 1 to 30 days.
By default, this setting lets you decide whether or not to include data for this conversion action in your “Conversions” reporting column. If you select “No,” the data will be included within the “All conversions” column. You’d want to uncheck this setting if you employ Smart Bidding and don’t want to include this particular conversion action in your bid strategy.
For this, the ideal choice is to set it to Last click.
The next step upon creating a conversion action is installing a global site tag on your Shopify theme code.
Here is the process to follow.
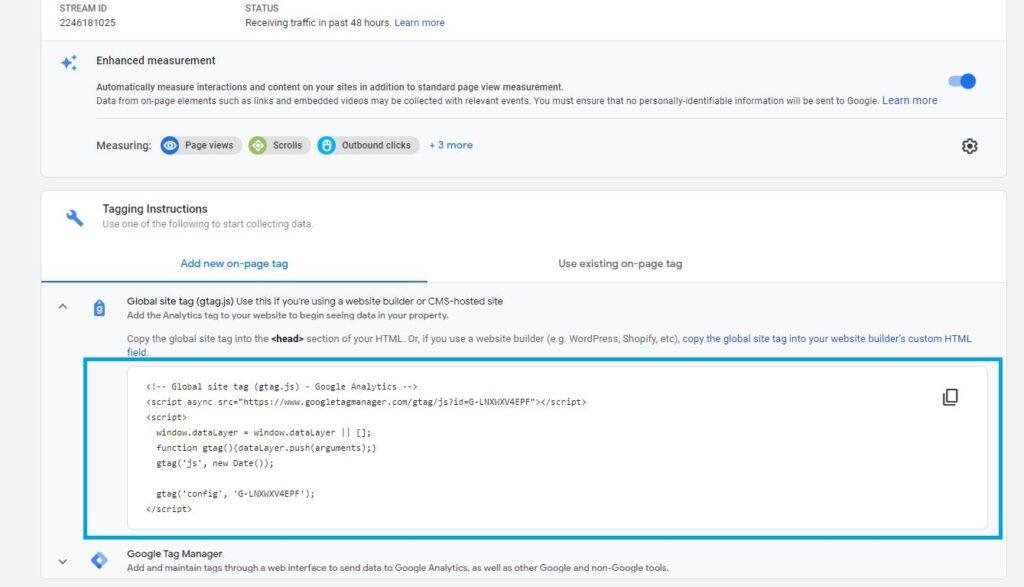
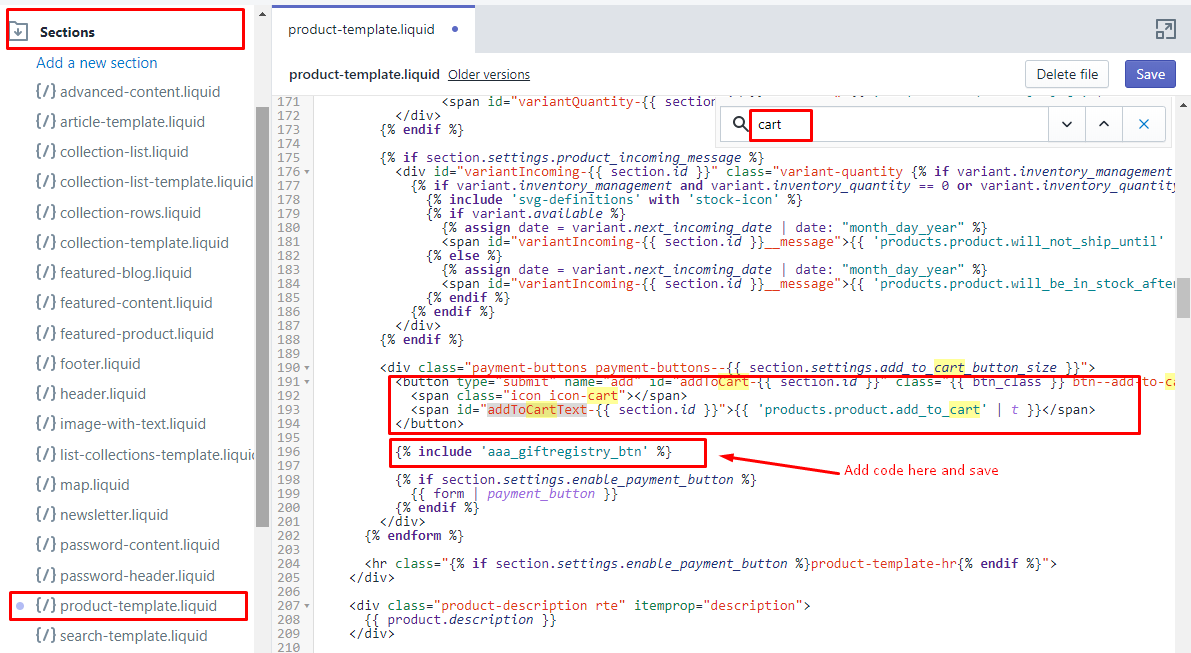
After installing the global site tag, the next step is to paste the event snippet on the checkout page. Event snippets track conversions when users click on one of your ads and later reach your e-commerce checkout page.
To install the event snippet, follow these steps:
Certain conversion scores will vary depending on the conversion actions you are tracking in your e-commerce store. You'll need two conversion actions if you're serving ads through Google Ads for two products.
If the clicks and sales of both products in the online store are the same, the purchase price of the more expensive product will be higher. Therefore, the value is higher because the customer buys an expensive product after clicking on the ad. This information is important because it provides insight into where you spend money on advertising.
If you want to track different values for each conversion, you need to change the event snippet to use the values in the data for each transaction. Here are the steps to follow to activate your conversion value.

During the process, it’s crucial to verify that your tag is functioning by checking the tracking status on the conversion actions page in your Google Ads account. The conversion tracking tag may take a few hours to get verified for display.
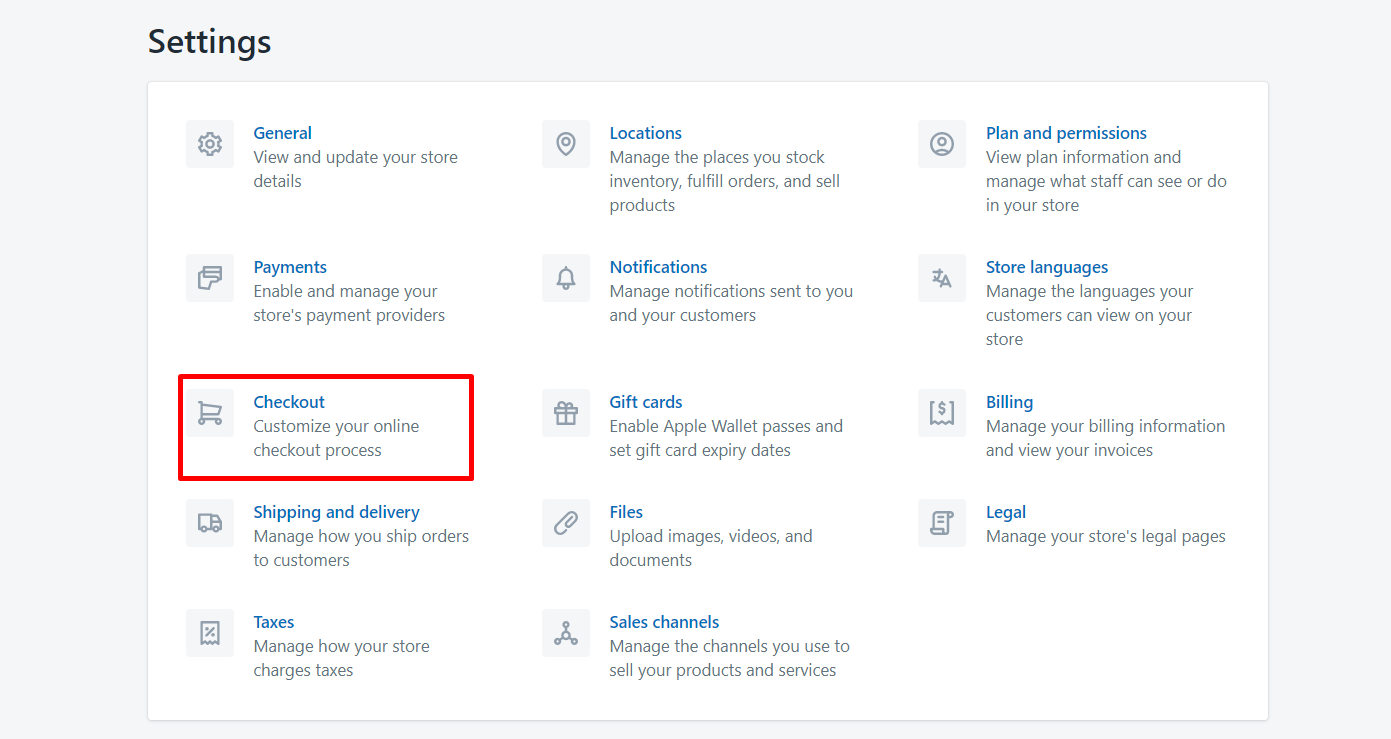
The first step in this process is getting to your Shopify admin portal.
In your Shopify Admin portal, click the Settings icon and select the Checkout option.
You will reap many benefits once you set up Shopify Google Ads Conversion Tracking on your online shop. Conversion tracking enables you to identify the response of clients upon interacting with your ads and then finally making a purchase.
Each conversion is recorded in real-time every time an action is completed. Thus, you can see your conversion rate and the cost per conversion.
Below are the benefits of conversion tracking in your Shopify store:
The data collected about the visitors on your site and the successful converts offer you greater insight into your most important customers. You can apply this information to improve your future marketing campaigns and conversion rate.
Besides identifying the number of clicks and impressions your ads generate, conversion tracking enables you to identify the best and worst-performing keywords and ad creatives.
With this knowledge, you change or remove the keywords that are not performing as expected. In addition, you can remove the worst performing ads and remain with ones leading to conversions instead of clicks only.

The most significant aspect of conversion tracking is that it enables you to understand the amount you are spending before getting actual leads or clients. Knowing how much you are paying to get an ad will determine if you are overpaying and what adjustments you should make in your marketing campaigns.
Without conversion tracking on your Shopify online store, it will be difficult for you to understand your most effective campaigns and the cost involved. With this information, you can focus on the campaigns that lead to more conversions.
Ad conversion and tracking are essential if you are marketing services or products online and seeking to optimize customer experience and increase lead or sales. It helps you to make wise and informed decisions to grow your business.
It may take quite some time to understand the most effective campaign. Adding conversion tracking into your marketing strategy enhances your visibility to your target audience and attracts more customers.